Wednesday, December 13, 2006

I've been slowly assembling the arcade now. So far I have the sides and front door attached. I've still got quite a bit to do but I can see the light at the end of the tunnel. Anyway, here are some pictures of my progress. The first one is the stand for the TV; it's ugly but it can support alot of wait and it keeps the TV at the correct angle. The second one is an inside view of the front door, showing the hinges and the back side of the coin door. The last pic is of the entire arcade.


Monday, December 04, 2006


I finally got a Wii! I always said that I would never wait in line before a store opened to purchase anything, but I went against my morals on Sunday.

The night before Black Friday I went to several Gamestops and found the one with the shortest line. I had read in their ads that each Gamestop would have a limited number of Wii's. The store opened at 7AM and I got there about 3:45AM. I was number 10 in line. At about 6AM the store manager showed up and notified everyone that there were only 6 Wii's.

I went back home after this and started doing some internet research. I found a site which had some info on shipment rumors. From this I found out that Best Buy, Target, Circuit City and Toys R Us were "relaunching" the Wii on the morning of Dec. 3rd. A friend and I got up bright and early at 4:30AM and headed over to Best Buy and we were first in line! At around 5:45 some store employees showed up and notified us that the internet rumors were wrong and that they didn't have any Wii's. Luckily I had planned out our foray in an area that had a Best Buy, Target, and a Circuit City in a one mile radius.

We headed towards the Target and saw that there wasn't a soul around so we went to grab some coffee. We got back about 10 minutes later to discover that there were 15 people in line ahead of us. Word to the wise: Get in line as soon as possible. So about 6AM we got in line. At 7AM they came out and gave everyone tickets for the 17 Wii's that they had in stock. I got ticket number 12! At that point they let us all sit inside the air lock to the store. You wouldn't believe how good it feels to sit in a warm place with a magic ticket that entitles you to a Wii. At 8AM they let us inside and we all bought our Wii's. They even had extra Wiimotes, nunchucks, and copies of most games in stock. So I got a wiimote, a nunchuck, and a copy of Zelda. I had heard that extra controllers were in short supply and I wanted to be able to play Wii Sports with my wife.

Now after having played with the Wii for a day, it was worth the trouble. It is just as cool as advertised and works beautifully. My wife isn't really into games very much and she likes it alot (especially Bowling).

I'll have another posting on my progress on the arcade soon.

Wednesday, November 15, 2006

I've finally completed putting the polyurethane on the sides, front, and second control panel tier. Below are some pictures of the completed pieces. The first is of the control panel (minus the T-moulding), and the second is of the sides and front pieces.

The next things on the agenda are to create a platform to position the TV at the correct height and angle. After that I need to attach the side panels and the front piece.


Wednesday, November 08, 2006

The compressor and spray gun arrived and I've put the first two coats of polyurethane on the arcade pieces. At least so far, I LOVE the spray gun. It's faster and it puts a better coat on than using a brush. I have to say this may have removed my distaste for finishing since now I don't have to worry as much about marring the surface with an errant brush mark. It seems like with a brush no matter how hard you try you'll mess up one of the coats of polyurethane; with the spray gun it's much less error prone. I'm trying to reserve judgment until I'm done (in case the final coats don't look as good or something), but so far I'm very impressed.

I don't have any pictures since I don't think they'd show much visible difference from the last ones.

Monday, October 30, 2006

This weekend I worked hard and got the rest of the pieces of the arcade prepped and stained. They all turned out pretty well. A couple of minor blemishes here and there, but there's nothing that anyone besides me will be able to see.

I just ordered an air compressor and a Critter spray gun that should arrive today, so I'm going to use that to spray coats of polyurethane on the recently stained pieces. Hopefully this will be faster and better looking than using the old foam brush method.

Thursday, October 26, 2006

I've had yet another delay, this time due to an injury. I was sharpening a cabinet scraper and my hand slipped and I cut the hell out of my finger. It's taken me nearly two weeks to even get back to the point where my finger is somewhat useable.

I have done a little bit of work despite my injury. I've gotten the 2nd tier constructed. It turned out pretty well, although my clamping and gluing of the mitred corners weren't perfect. I ended up using a dowel peg system to connect the top to the 2nd tier sides. I also came up with a way to attach a USB joystick to the control panel in such a way as to make it look like it was custom built for the tier.

The finishing of all of these pieces has also begun. Last night I got the one of the side panels stained. Tonight I'll probably work on staining either the 2nd tier or the front panel.


Wednesday, October 11, 2006

Another long delay has occurred in my postings, but have no fear I've stil lbeen working hard in the interim. So first off I've finished cutting the side panels and the coin door (pictured below). I'm also almost done with the second tier of the control panel (which will hold a 4-way joystick, a spinner, a flight stick, and of course some more buttons. The second tier will also be interchangeable so that later I can add positional guns or steering wheels to my ubercade. Hmmm, maybe that's not a bad name for it: Ubercade....

Anyway, as soon as I finish with the second tier I'll post some pics of it. Then I have to stain and polyurethane EVERYTHING.


Wednesday, August 23, 2006

The pattern cutting bit did indeed work like a charm. Last night I finished the second side panel using my jigsaw to roughcut the shape and then using the pattern cutting bit with the first side panel as a template. It worked exactly like I thought it would, which is nice since that usually happens so rarely.

Tonight I'm planning on cutting the front door to size and then cutting the hole for the coin door. After that I'll probably work on the second tier control panel. Then I'm going finish (as in stain and polyurethane) everything at once.

Sunday, August 20, 2006

I've been hard at work this weekend completing the first side piece. It came out just as I had planned it. Below I've got a picture of it propped up against the interior structure, with the control panel sitting where it will go in the final installation.

The second side should be easy to cut. My plan is to set the finished side on a 4'x8' sheet of plywood and then trace around it. I'll then rough-cut just outside of those lines using my circular saw and jigsaw. Then I'll use a pattern cutting bit in my router to use the first side as a template to cut the second side to exactly the same dimensions. This level of precision isn't really needed, but it make cutting the second side way faster since I can be a little sloppier on the initial cuts. Or at least that's my theory...

Wednesday, August 16, 2006

I finally got all of the controls mounted in the control panel now. I also cut the hole for the second tier control panel. Picture below.

Next: Cutting the side panels.


Tuesday, August 15, 2006

Another update: I got done finishing the main control panel (picture below). And I also figured out that finishing is not my favorite thing. Don't get me wrong, I think it makes the wood look beautiful, I just don't enjoy applying polyurethane (the stain isn't as bad as the polyurethane).

Sunday, July 23, 2006

The control panel got a makeover this weekend and now looks like swiss cheese. I routed all of the joystick recesses, drilled holes for all the buttons, cut the hole for the trackball, and attached the hinges to the top and bottom pieces. I didn't clean up the sawdust the entire time I was cutting all of the holes; you wouldn't believe how big the pile was by the time I was done.

Next up I just need to finish the control panel (as in apply stain and polyurethane to it), and then I can mount and wire the controls.

Below are two pics; the first is of the control panel with the lid up showing the underside of the top panel, the second is with the top down.


Tuesday, July 18, 2006

Over the weekend I got a few more things done. After successfully mounting the controls on the sample panel, I spent some time marking out where the holes and cuts should be made in the actual panel. This was a bit strange since I marked everything on the underside of the top panel, so it all had to be mirrored.

In addition, I got the slot for the T-moulding routed in the outside edge of the control panel. I ordered a bit from Rockler to do this and it did the job perfectly.

Tonight I'm going to recheck the layout on the control panel and then start cutting the holes for the buttons, joysticks, and trackball.

Friday, July 14, 2006

Tonight I successfully mounted the trackball, joystick and a button on my sample panel. There's a pitcure below. I think it turned out pretty well.

As I was working tonight a HUGE moth flew in to the shop and landed on my workbench (luckily on a part I wasn't using at the time). It then sat in the same spot for over an hour as I drilled hammered and sawed just two feet away on the same bench. I must have gotten some sawdust on it while I was working, and yet it didn't move. Maybe it's dead or maybe we've got ourselves a mascot. There's a picture of it below as well.


Thursday, July 13, 2006

It's been a while since I've posted so here's a few new pics of my progress:


Here I've made a few holes for mounting a button and a recessed hole for a joystick. These are just sample holes in a piece of scrap wood. I'm particularly proud of the recessed hole since I routed it freehand (it's on the underside of the control panel so the uneven edges won't show. I still need to do a test hole for the trackball and spinner. When I get done with this I'll post a pic with the actual controls mounted on the board.


This is a pic of the control panel box (without the top panel). The ugly hole in the back is for cabling; it won't show once the top is attached.


And here's a pic of the control panel with the top, sitting on top of the arcade structure. This shows the proper height and position of the control panel. Now just imagine two 7' tall sides, a front panel with coin door and a monitor above the control panel, and you should have a pretty good idea what the finished product will look like.

Next up: Finish the control sample mountings and draw out the final control layout on the top panel.

Wednesday, June 28, 2006

Last night I got the rest of the aprons pieces glued up, which is tricky with only two hands, but I think I pulled it off. I also finally took some more pictures.


The picture above is of the stained sample we made. I think we're going to use the technique we used on the center-bottom section in the photo.


This is a (slightly blurry) picture of the tenon jig I made last weekend.


This is a pic of the feather board I made to be used on the sliding miter table. It's amazing how much a feather board helps with rip cuts.


This last one is of the glued-up apron pieces on the clamps.

Friday, June 23, 2006

Last night I put in a little time and completed a feather board which attaches to the BT3100's sliding miter table. I also completed cutting about half the pieces for the tenon jig.

It was pretty cool because I got to do several firsts:
-Worked with MDF for the first time
-Made a 45 degree miter cut on the SMT
-Cut a large sheet by myself (using roller stands to support it instead of having a human there to catch it)
-Cut a blind slot using the router table

Thursday, June 22, 2006

Not much progress over this past week. I had to work last weekend, so I didn't get much of a chance to work on the arcade.

On the up side, I did get the back piece cut and tested out the stain I bought. I think we're going to use an American Oak gel stain using a dry brush technique.

I also came up with an idea to clamp and glue the angled pieces together. It's basically a homemade version of the Clamp-It system. In order to do that I need a tenon jig, so I've bought the materials to build one from the BT3Central website. And while I'm at it I'm going to make a finger board that clamps to the sliding miter table as well. So this will set me back a bit time-wise, but all of these accessories will be very useful in the future, so I think it's time well spent. So that'll probably be the weekend...

Wednesday, June 14, 2006

I just found some pics of me at the shooting range with a friend of mine. I can't remember exactly what the guns were (they weren't mine), but I know that that there were several .22 target rifles and another Russian or Czech rifle that shot way bigger ammo.


Tuesday, June 13, 2006

So we've made some good progress on the arcade over the past week or so. We've finished up the angle cuts and rabbits on the control panel side pieces. This is the time I've really used my router and it performed admirably.

Next up we've got to cut the back piece (forgot to do that before) and then we're going to be starting the assembly process. We've still got some work to do on the control panel top: cut the corners off of it, cut holes in it for the controls, and route a slot in the edges for the T-moulding to fit into.

I also bought some gel stain that I'm going to try out on a sample piece of birch to see if it looks good. If it looks decent, then I'll get a bigger can of it and put that followed by several coats of polyurethane on all the exterior pieces.

Here's a few pics:
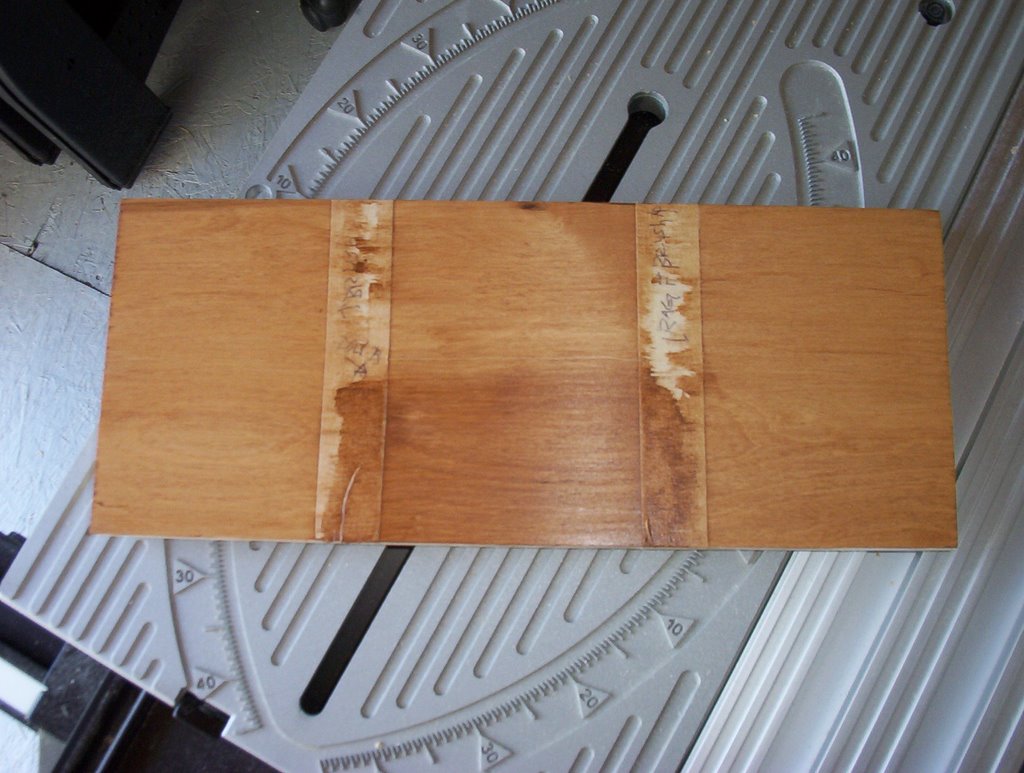
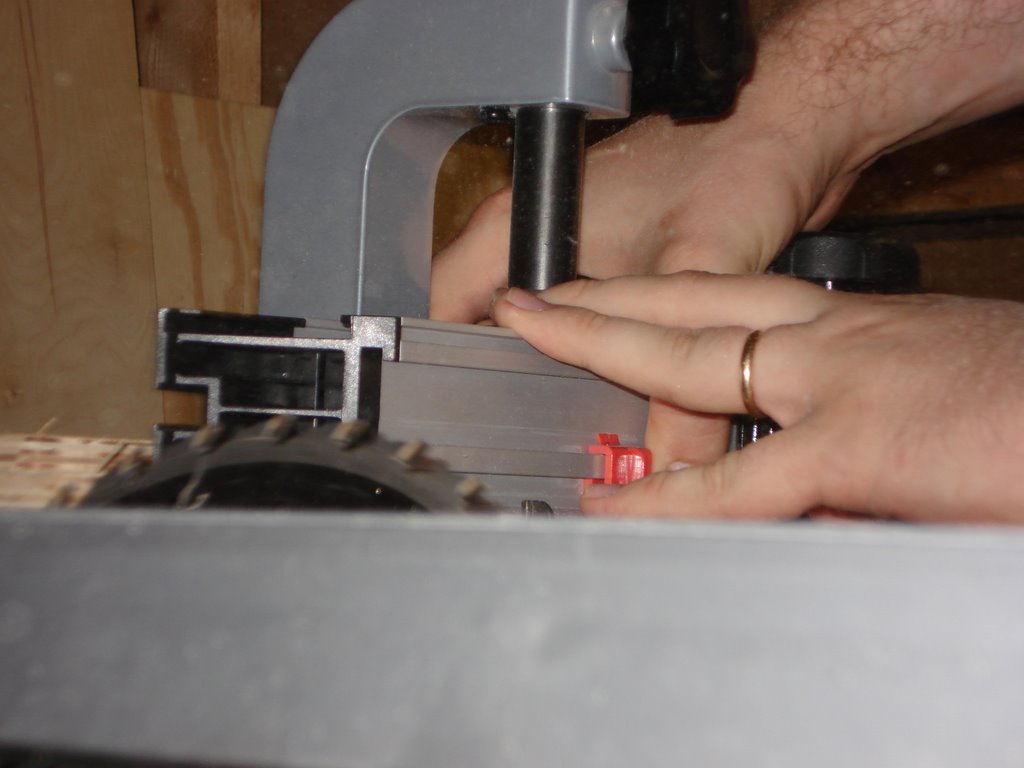
This is a weird shot. I swear my hands were over 6 inches away from the blade but it looks like I'm going to slice a finger right off.


Here's another one that's a bit out of focus. This is at least a better angle that makes me look like I actually know how to use a saw.

Monday, June 05, 2006

So this weekend we got a bit more done on the arcade. We cut a 4'x8' sheet of birch plywood down to size and made all the pieces needed for the control panel. So the parts remaining for the control panel are to:

1) cut 45 degree mitres on angled side pieces
2) cut rabbits in side pieces
3) cut corners from the control panel top
4) cut holes for controls
5) route T-moulding slot into control panel edges
6) cut holes for wiring, bolt holes, and hinges
7) finish control panel
8) assemble control panel
9) install and wire controls

We're planning on working on at least the first two or three steps on Wednesday night.

After all that is done, we'll essentially have a functional arcade cabinet, since we can then mount the control panel to the previously completed 2x4 structure and set the TV on top too. It'll just be ugly as hell at that point. So after that is done it's on to the somewhat-less-tedious parts of cutting, finishing, and assembling the side pieces, the front door, and the angled platform for the TV. And after that there's just a few more cosmetic details like making the bezel and marquis.

Are we going to make it by the middle of July (my personal target date)? I dunno yet, but we should be close.

I'll post more pictures when we've got the control panel assembled.

Tuesday, May 23, 2006


I've made some real progress on the arcade over the past week. I finished up most of the internals of the arcade in my sketchup drawing (at least enough to start on building the thing). I got most of the wood and hardware that was needed (except for the big 4'x8' sheets of plywood for the sides). I also got started on the internal framework. So now I've got a roughly 3'x3' frame of 2x4s with a platform and casters on the bottom. To this frame I'll be attaching the control panel, the platform for the TV, and eventually the sides of the cabinet. This weekend I'm going to be out of town, but the weekend after that I'll be working on putting together the control panel.

Tuesday, May 02, 2006


I did a bit more work on the arcade plans. I still need to do a bit more, such as adding dimensions, implementing the internal parts of the cabinet, and making some modifications like making the cabinet taller, but it's looking pretty good so far. Above is a screenshot of what I've got at the moment.

Monday, May 01, 2006

So Google has done it again: They've bought a company that makes 3D modeling software called Sketchup. I'm no expert in the field of 3D modeling software but I've tried out a few products here and there, and this one is head and shoulders above the rest. It is some of the most intuitive software I've ever used. By and large, things just work the way you think they would. There are very few tools to learn because the tools that are there can mostly do anything you need. It seems like in Sketchup you can build something in minutes that would take hours or days to do in traditional modeling software. Sketchup used to cost $500, but Google has now put out a slightly crippled FREE version (you can't export to other 3D file formats and you don't have the tools to make 3D contour maps). It's becoming obvious that one of the real strongpoints of Sketchup is the ease with which you can explore design alternatives; you can try things out quickly and easily, and see how they look (what if this part was longer, what if this piece was inset further, what if I make this side smaller, etc).

I've decided to use it to draw up the plans for the arcade. I'm almost done with the drawing already (I put in a couple of hours this weekend). I think in the future I'm going to use this to model my woodworking projects as well. It's just so easy.

BTW, in addition to working on the 3D model of the arcade I made a full size layout of the control panel (unfortunately, using boring pencil and paper).

Monday, April 17, 2006

OK, so I finally got the spinner working with the ME4. I first tried replacing the active low optical board on the spinner with a homemade active high board. This appeared to work great but for some reason the ME4 wouldn't read the signals correctly. Basically the mouse would jump back and forth rapidly instead of moving in one direction. This would lead me to believe the signals weren't actually quadrature, but after looking at them with an o-scope they certainly looked quadrature. So at this point I was somewhat disapointed and so I went back to the pullup resistor idea. This time I used two variable resistors as pullups. Once again at 1Kohm the ME4 was not reading the signals, but I turned up both resistors and at about 1.8K the ME4 started responding. Now on to control panel construction...

Thursday, April 13, 2006

I've now had a chance to try out the ideas Hagstrom sent me (see the 4/10 post) for getting my Tornado spinner working with the ME4. They didn't work. At least now the voltage on the spinner sensor lines is changing but the levels are all wrong (the low level is about 2.2V and the high is about 3.5V). So I wrote Hagstrom back and they suggested that I increase the value of my pullup resistors from the 1K they suggested. I think this may work, but it might be simpler to just build an active high optical encoder board for the Tornado. I've already got all the parts (two optical interruptor sensors, a resistor, and a 4 contact 0.1" header) I need to do it and the circuit is pretty simple; then I won't have to worry so much about resistor values and voltage levels.

Incidentally, I hooked up one axis of my trackball to the spinner input on the ME4 and it worked fine. So at least the spinner channel isn't fried or anything.

UPDATE: I breadboarded the active high optical encoder circuit last night and it seems to be working. Now I just have to solder it onto some perf board and mount the board to the spinner. I'll probably post some pics of the finished product and the circuit schematic after I have it done.

Monday, April 10, 2006

I started officially working on the arcade project this weekend. I started by hooking up my Happ Controls trackball to a Hagstrom Electronics ME4. The ME4 basically just makes a trackball (and optionally a spinner) look like a mouse to your PC. So the trackball went off without a hitch, but then I tried to hook up my SlikStik Tornado spinner and that did not work. So I spent some time debugging (hooked up the spinner to a breadboard to make sure that it was working, etc.). It turned out that the spinner is active low (meaning the signal lines need to be pulled UP to 5V) and the ME4 expects an active high signal (meaning it is pulling the signals DOWN to ground via some 2.2K resistors). So I emailed Hagstrom Electronics at 11PM and the next morning before 9AM they had replied and said I was indeed correct and I needed to pull up the signal lines to 5V using a 1K resistor. I'm pretty impressed with their customer service. Nice job Hagstrom. I think I'll test out the fix tonight.

Thursday, April 06, 2006

I bought a Ryobi BT3100 table saw from HomeDepot not too long ago. I found out about it from Make magazine, and then checked out the fanpage. It seemed like a pretty good tradeoff between price and features/precision. So far I've been pretty happy with it. I've now started watching The New Yankee Workshop obsessively. I think pretty soon I'm going to buy a router, since the saw already includes an accessory table that allows a router to mount underneath. So now I'll have a table saw and a router table. Now I just have to figure out what to make with it...
UPDATE: I just got a Ryobi router (RE180PL) too. Purists would make fun of me for not getting a Porter Cable, but since I'm only a weekend warrior in this hobby and I'm not making 30 cuts a day I went with the Ryobi because it was half as much and it easily mounts to my table saw. So there.

Wednesday, April 05, 2006

Recently I got a 27" TV from a guy off of craigslist, with the intention of using it for my arcade project. So here's the thing: I looked at TVs at the big stores like Best Buy and Fry's and 1) they're expensive and 2) all the current designs have speakers attached to the sides of the TV which make it too big to fit in my arcade enclosure. So I started looking for older TVs on craigslist, and I found one that was only $25 because the sound didn't work (the picture is fine). The guy lived down on Town Lake in downtown Austin, and he was cool as hell. He was definitely a hippy and he even said "Peace, man" as his parting comment to me. What can I say, you gotta love hippies (and Austin too for that matter since the two are inextricably linked).

So my next big project is a stand-up arcade. It's going to be your typical one with a PC running MAME plus some other emulators (NES, SNES, GB, GBA, Genesis, etc.). I think I'm going to use GameEx as the front end for it. My inspiration for it comes from two arcade projects: The Supercade and Jubei. Basically, I want the natural wood look of Jubei, and the 2-tiered control layout of Supercade (although I'm going to make the 2nd tier detachable so I can create modular control panels for positional guns and steering wheels). The only thing that's unique about my design is that it's going to be the most complete arcade that I've seen yet: it'll have joysticks and buttons for 4 players, a Tornado spinner, a trackball, a 4-way joystick, two light guns, ports for attaching 4 PSX and N64 controllers, a flightstick, and in the future I should be able to add expansions for positional guns and steering wheels. So it's going to be the cadillac of arcades.

Monday, April 03, 2006

It's been quite some time since I've posted. I guess getting married and buying a house will do that to you. So I'm going to try and start posting more now. I've been busy in my spare time, so I'll be posting more info about what I've been up to over the next week or two.