Showing posts with label arcade. Show all posts

Tuesday, May 08, 2007

After a long delay I finally put the last nails in the coffin of the arcade project. It's finally done!!!

Here are some pics of the final assembly stages including the back of the marquee box, the bezel, the "flippy" access door, and the marquee lit from behind. Soon I'll be posting some pictures of the arcade with the TV installed and maybe even playing a game or two. Enjoy!


Monday, March 26, 2007

This weekend I finished up staining and polyurethaning the remaining arcade pieces. I'll spare everyone the boring pictures since it's just a bunch strips of stained plywood.

My dog decided to help out by chewing on one of the pieces just as I was about to put on the first coat of polyurethane. It ended up being repairable but I was still pretty pissed.

Later tonight I'm going to start mounting the pieces.

Tuesday, March 20, 2007

I'm still alive, and I have even been working on the arcade (albeit slowly). The only thing left to do on the arcade is making and mounting the bezel, and mounting the marquee. This weekend I got all of the pieces cut for both of these things. Next up I need to stain and polyurethane the pieces (they're all birch plywood). After that I just need to mount everything and then I'm finally done!

Thursday, March 01, 2007

We just got a dog about 2 weeks ago. We found her at the Georgetown Animal Shelter, and we think she's a 1 year old lab.

And she's why I'm not done with the arcade yet (or at least that's who I'm going to blame it on). I have gotten a little bit further on the arcade. This week I finished adding supports to the arcade so that it doesn't rock as much while you're playing. I also finished the back panels which slide into slots I routed in the arcade to cover up the innards of the arcade in the back.


Wednesday, February 14, 2007

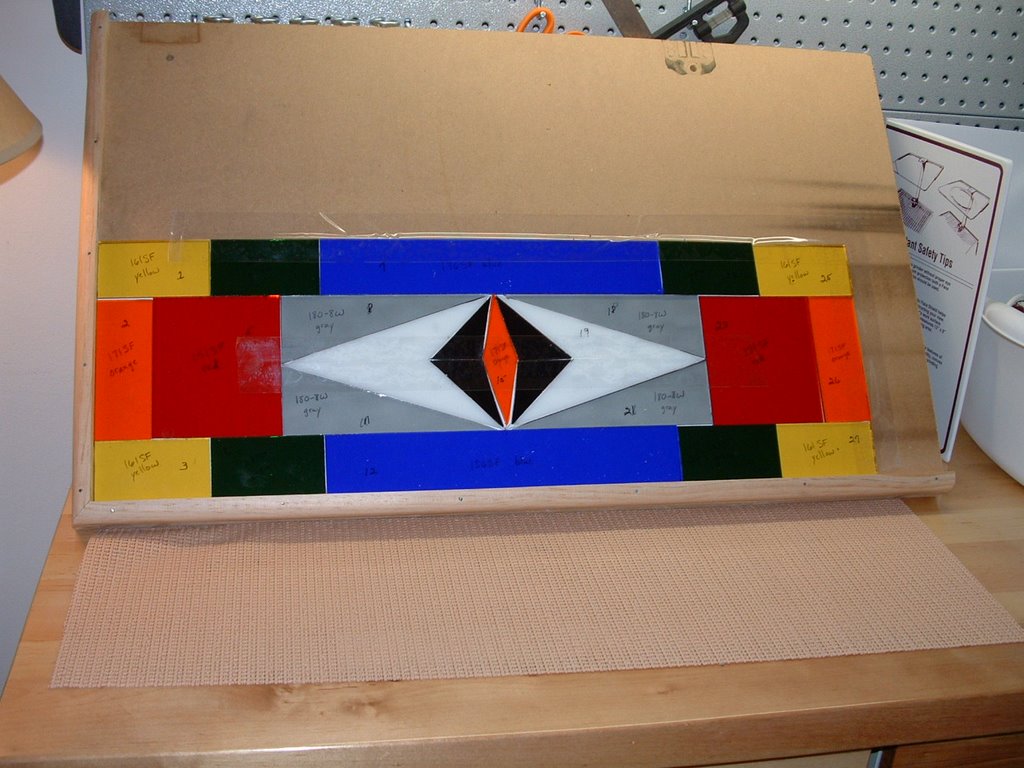
The stained glass marquee is done and being shipped to me soon. Here's a picture.

Monday, February 12, 2007

I finished up the T-moulding and I think it looks pretty good. Here's a picture.

I also got the first light gun hooked up. I'm not very impressed with its accuracy but it could also be the old TV I'm using...

Thursday, February 08, 2007

I've started working on the T-moulding now. It's surpisingly easy stuff to work with and it really gives the arcade a nice look. It probably shouldn't take me more than another night or two to get the rest of the T-moulding knocked out.

Sunday, February 04, 2007

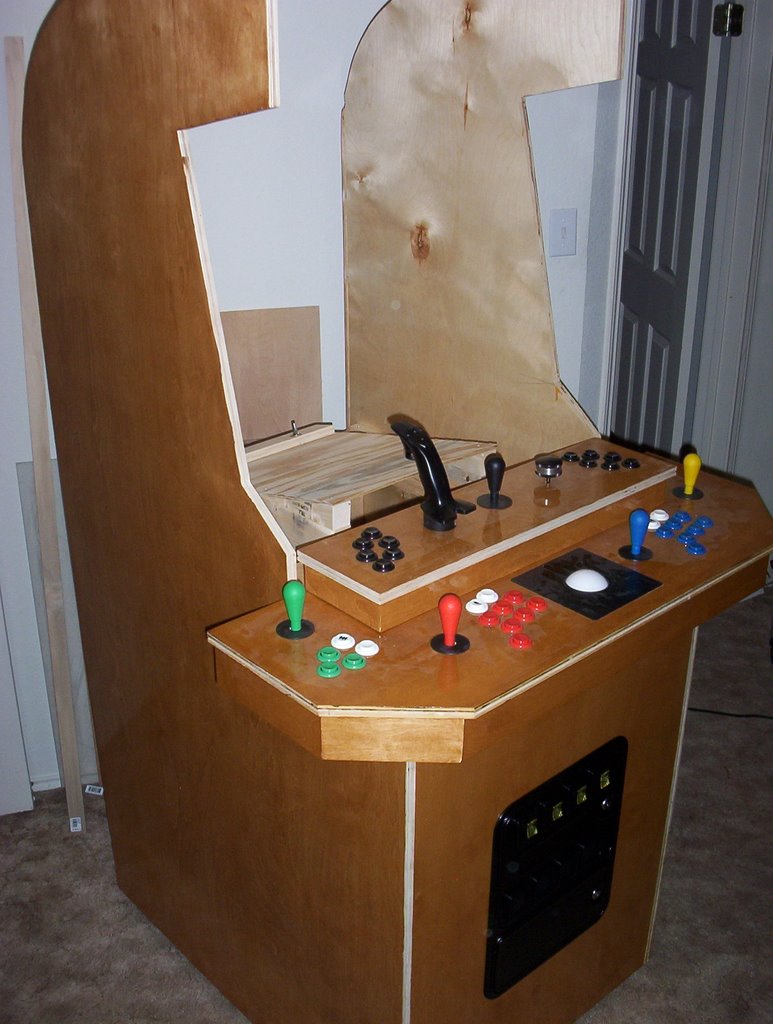
I finally finished up the wiring. I also installed a new video card, MAME, GameEx, and several emulators on the PC that will be running the arcade. I may have to make one minor change to the wiring, but for the most part it is working great. Here are several pics. One is of the control panels fully installed. There is another couple of pics which show the wiring for the top and bottom tier. The wiring is definitely not as nice looking as some of the other arcade cabinets I've seen, but it works and that's what counts. Also notice in the pic of the top tier that there are connectors which connect the top to the bottom tier. This is so the top tier can be easily disconnected and a new tier added (perhaps one with positional guns or steering wheels).


Thursday, February 01, 2007

Last night I finished up the wiring on both control panel tiers. I even hooked it all up to my laptop and it worked on the first try. I though for sure that I would have missed a connection somewhere (there's over 150 different connections). I guess I lucked out for once.

The only thing left to do in the wiring category is to clean it all up with a large pile of zip ties. Right now it looks like a rat's nest of wires. I'm hoping to knock that out tonight. I'll post some pics when it's done.

Tuesday, January 30, 2007

Still working on the wiring in the arcade. The only things left to do are create the connectors for the spinner interface and clean up the wiring with zip ties. I'll post some pics as soon as I'm done.

In the meantime, the stained glass marquee is being built. Here's a picture. The picture shows the glass pieces taped in place and without any back-lighting.

Wednesday, January 17, 2007

It's been over a month since my last post, and I'm still not done with the arcade. The holidays and various other things have slowed me down a bit. I've been working on getting all of the buttons and other controls wired up. This has turned out to be alot more time consuming than I thought. But I'm almost done with it.

As soon as that is done I'll be able to actually hookup the PC and the TV and test everything out. Joy! The remainder of the work will then be mostly cosmetic.

Oh, I almost forgot: I completed the design for the stained glass marquee (both the layout and the colors and styles for the pieces of glass), so it is being worked on right now.

Wednesday, December 13, 2006

I've been slowly assembling the arcade now. So far I have the sides and front door attached. I've still got quite a bit to do but I can see the light at the end of the tunnel. Anyway, here are some pictures of my progress. The first one is the stand for the TV; it's ugly but it can support alot of wait and it keeps the TV at the correct angle. The second one is an inside view of the front door, showing the hinges and the back side of the coin door. The last pic is of the entire arcade.


Wednesday, November 15, 2006

I've finally completed putting the polyurethane on the sides, front, and second control panel tier. Below are some pictures of the completed pieces. The first is of the control panel (minus the T-moulding), and the second is of the sides and front pieces.

The next things on the agenda are to create a platform to position the TV at the correct height and angle. After that I need to attach the side panels and the front piece.


Wednesday, November 08, 2006

The compressor and spray gun arrived and I've put the first two coats of polyurethane on the arcade pieces. At least so far, I LOVE the spray gun. It's faster and it puts a better coat on than using a brush. I have to say this may have removed my distaste for finishing since now I don't have to worry as much about marring the surface with an errant brush mark. It seems like with a brush no matter how hard you try you'll mess up one of the coats of polyurethane; with the spray gun it's much less error prone. I'm trying to reserve judgment until I'm done (in case the final coats don't look as good or something), but so far I'm very impressed.

I don't have any pictures since I don't think they'd show much visible difference from the last ones.

Monday, October 30, 2006

This weekend I worked hard and got the rest of the pieces of the arcade prepped and stained. They all turned out pretty well. A couple of minor blemishes here and there, but there's nothing that anyone besides me will be able to see.

I just ordered an air compressor and a Critter spray gun that should arrive today, so I'm going to use that to spray coats of polyurethane on the recently stained pieces. Hopefully this will be faster and better looking than using the old foam brush method.

Thursday, October 26, 2006

I've had yet another delay, this time due to an injury. I was sharpening a cabinet scraper and my hand slipped and I cut the hell out of my finger. It's taken me nearly two weeks to even get back to the point where my finger is somewhat useable.

I have done a little bit of work despite my injury. I've gotten the 2nd tier constructed. It turned out pretty well, although my clamping and gluing of the mitred corners weren't perfect. I ended up using a dowel peg system to connect the top to the 2nd tier sides. I also came up with a way to attach a USB joystick to the control panel in such a way as to make it look like it was custom built for the tier.

The finishing of all of these pieces has also begun. Last night I got the one of the side panels stained. Tonight I'll probably work on staining either the 2nd tier or the front panel.


Wednesday, October 11, 2006

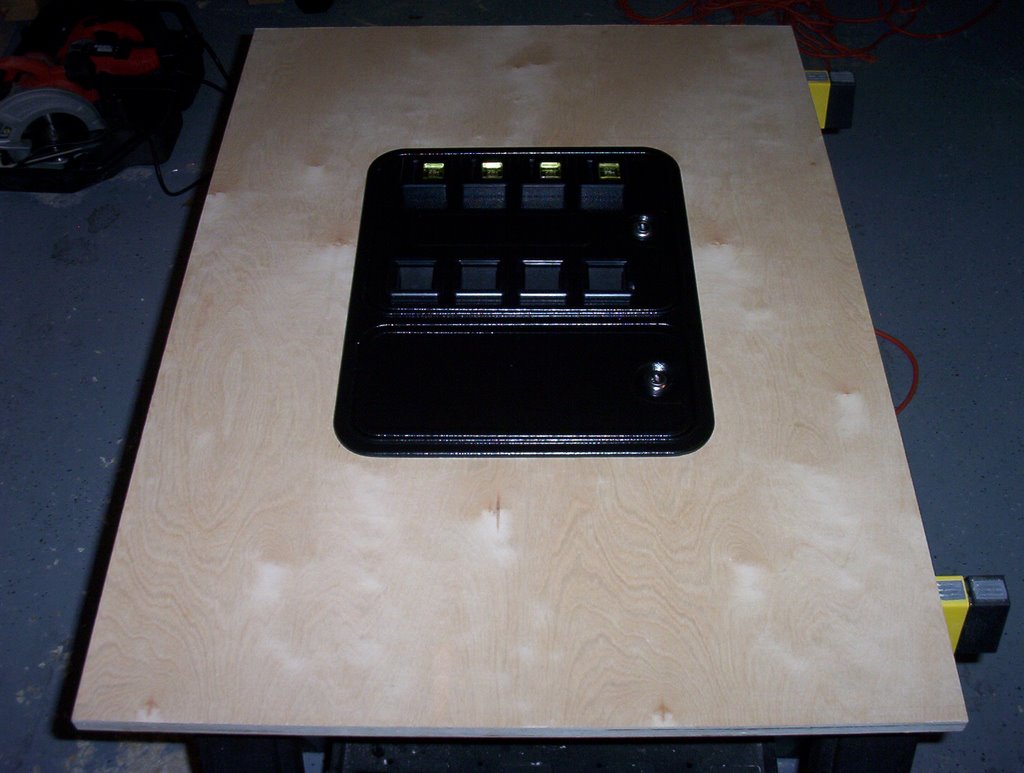
Another long delay has occurred in my postings, but have no fear I've stil lbeen working hard in the interim. So first off I've finished cutting the side panels and the coin door (pictured below). I'm also almost done with the second tier of the control panel (which will hold a 4-way joystick, a spinner, a flight stick, and of course some more buttons. The second tier will also be interchangeable so that later I can add positional guns or steering wheels to my ubercade. Hmmm, maybe that's not a bad name for it: Ubercade....

Anyway, as soon as I finish with the second tier I'll post some pics of it. Then I have to stain and polyurethane EVERYTHING.


Wednesday, August 23, 2006

The pattern cutting bit did indeed work like a charm. Last night I finished the second side panel using my jigsaw to roughcut the shape and then using the pattern cutting bit with the first side panel as a template. It worked exactly like I thought it would, which is nice since that usually happens so rarely.

Tonight I'm planning on cutting the front door to size and then cutting the hole for the coin door. After that I'll probably work on the second tier control panel. Then I'm going finish (as in stain and polyurethane) everything at once.

Sunday, August 20, 2006

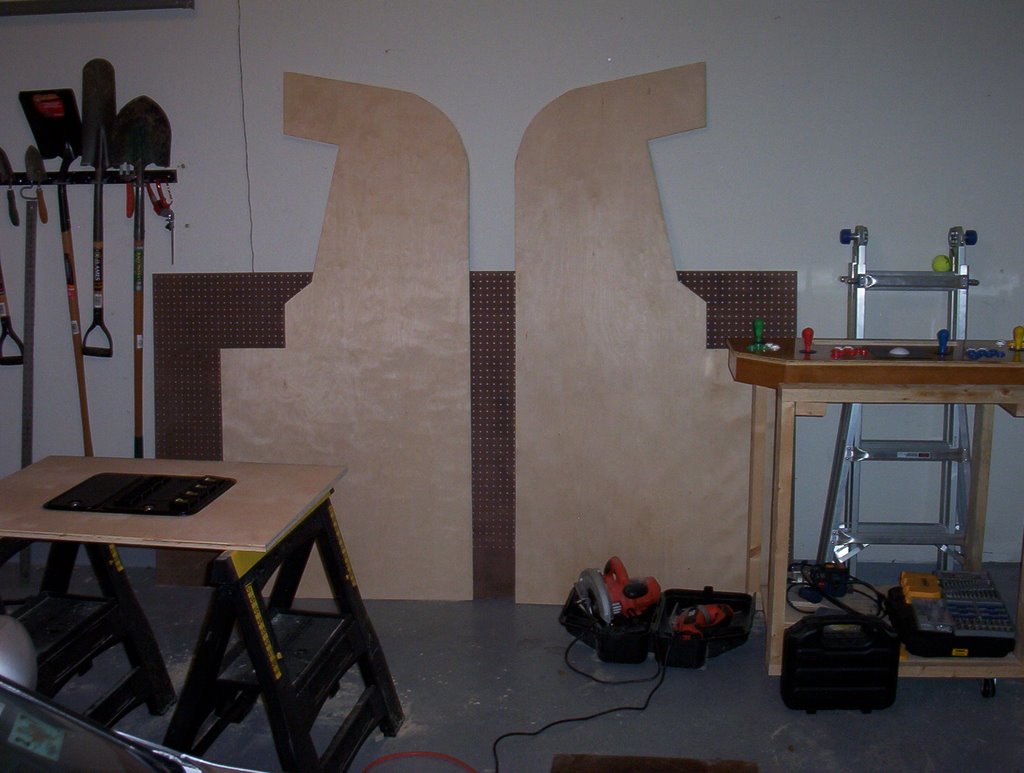
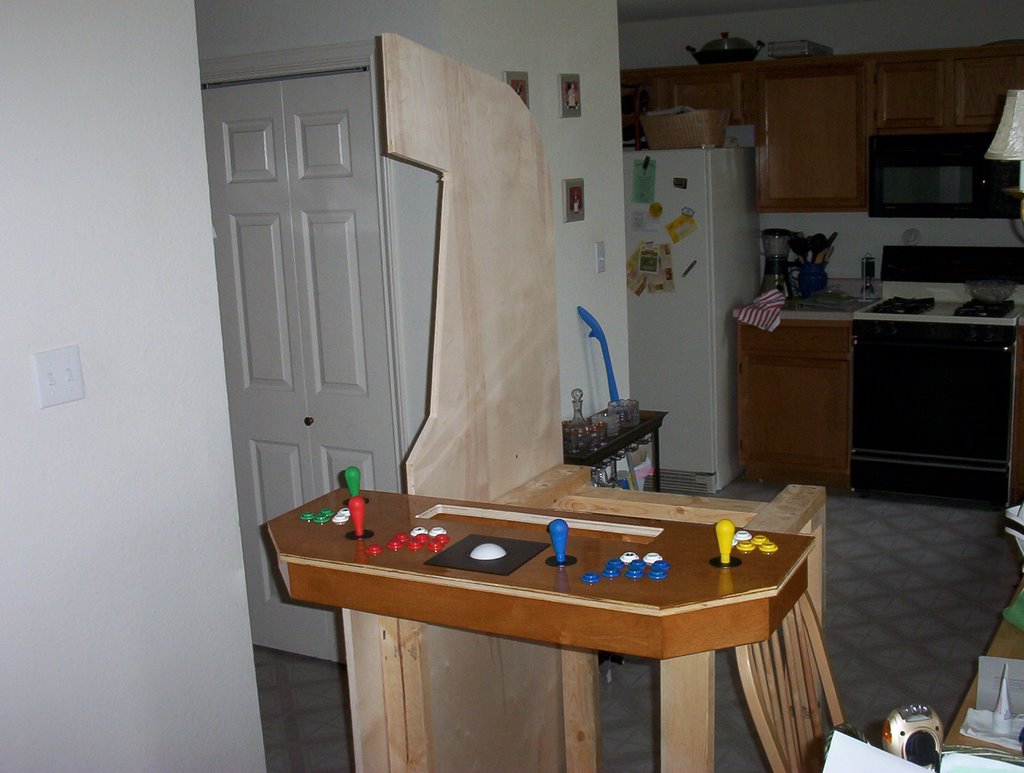
I've been hard at work this weekend completing the first side piece. It came out just as I had planned it. Below I've got a picture of it propped up against the interior structure, with the control panel sitting where it will go in the final installation.

The second side should be easy to cut. My plan is to set the finished side on a 4'x8' sheet of plywood and then trace around it. I'll then rough-cut just outside of those lines using my circular saw and jigsaw. Then I'll use a pattern cutting bit in my router to use the first side as a template to cut the second side to exactly the same dimensions. This level of precision isn't really needed, but it make cutting the second side way faster since I can be a little sloppier on the initial cuts. Or at least that's my theory...

Wednesday, August 16, 2006

I finally got all of the controls mounted in the control panel now. I also cut the hole for the second tier control panel. Picture below.

Next: Cutting the side panels.